Summary: in this tutorial, you will learn how to use SQLite SELECT statement to query data from a single table.
The SELECT statement is one of the most commonly used statements in SQL. The SQLite SELECT statement provides all features of the SELECT statement in SQL standard.
Simple uses of SELECT statement
The following example show how to use the SELECT statement to perform a simple calculation:
SELECT 1 + 1;Code language: SQL (Structured Query Language) (sql)
You can use multiple expressions in the SELECT statement as follows:
SELECT
   10 / 5,
   2 * 4 ;Code language: SQL (Structured Query Language) (sql)
Querying data from a table using the SELECT statement
We often use the SELECT statement to query data from one or more tables.
Here’s the syntax of the SELECT statement:
SELECT DISTINCT column_list
FROM table_list
  JOIN table ON join_condition
WHERE row_filter
ORDER BY column
LIMIT count OFFSET offset
GROUP BY column
HAVING group_filter;Code language: SQL (Structured Query Language) (sql)
The SELECT statement is the most complex statement in SQLite. To make it easier to understand each part, we will break the SELECT statement into multiple easy-to-understand tutorials.
- Use the ORDER BY clause to sort the result set.
- Use the DISTINCT clause to query unique rows in a table.
- Use the WHERE clause to filter rows in the result set.
- Use the LIMIT OFFSET clause to constrain the number of rows returned.
- Use the INNER JOIN or LEFT JOIN to query data from multiple tables using join.
- Use the GROUP BY clause to group rows into groups and apply aggregate functions to each group.
- Use the HAVING clause to filter groups.
In this tutorial, we’ll focus on the simplest form of the SELECT statement that allows you to query data from a single table:
SELECT column_list
FROM table;Code language: SQL (Structured Query Language) (sql)
Even though the SELECT clause appears before the FROM clause, SQLite evaluates the FROM clause first and then the SELECT clause, therefore:
- First, specify the table from which you want to get data in the
FROMclause. Notice that you can have more than one table in theFROMclause. We’ll discuss it in the subsequent tutorial. - Second, specify a column or a list of comma-separated columns in the
SELECTclause.
You use the semicolon (;) to terminate the statement.
SQLite SELECT examples
Let’s take a look at the tracks table in the sample database.
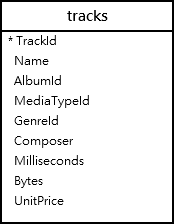
The tracks table contains columns and rows. It looks like a spreadsheet.
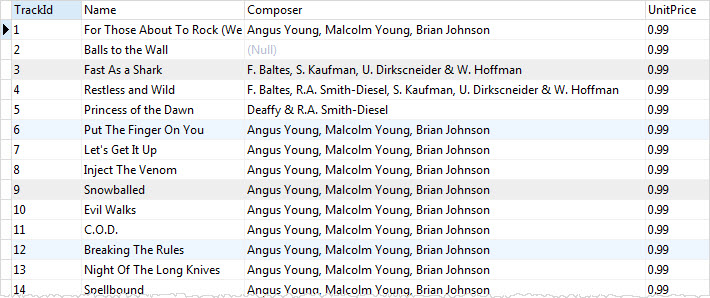
To get data from the tracks table such as trackid, track name, composer, and unit price, you use the following statement:
SELECT
	trackid,
	name,
	composer,
	unitprice
FROM
tracks;Code language: SQL (Structured Query Language) (sql)You specify a list column names, from which you want to get data, in the SELECT clause and the tracks table in the FROM clause. SQLite returns the following result:
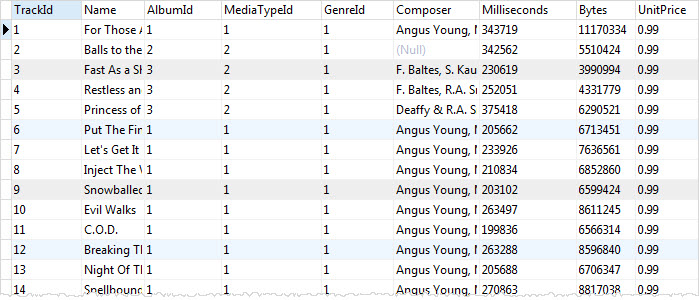
To get data from all columns, you specify the columns of the tracks table in the SELECT clause as follows:
SELECT
	trackid,
	name,
	albumid,
	mediatypeid,
	genreid,
	composer,
	milliseconds,
	bytes,
	unitprice
FROM
tracks;Code language: SQL (Structured Query Language) (sql)For a table with many columns, the query would be so long that time-consuming to type. To avoid this, you can use the asterisk (*), which is the shorthand for all columns of the table as follows:
SELECT * FROM tracks;Code language: SQL (Structured Query Language) (sql)The query is shorter and cleaner now.
However…
You should use the asterisk (*) for testing purposes only, not in the application development.
Because…
When you develop an application, you should control what SQLite returns to your application. Suppose, a table has 3 columns, and you use the asterisk (*) to retrieve the data from all three columns.
What if someone removes a column, your application would not be working properly, because it assumes that there are three columns returned, and the logic to process those three columns would be broken.
If someone adds more columns, your application may work but it gets more data than needed, which creates more I/O overhead between the database and application.
So try to avoid using the asterisk (*) as a good habit when you use the SELECT statement.
In this tutorial, you have learned how to use a simple form of the SQLite SELECT statement to query data from a single table.